This feature allow authors on the site to easily import their Google Docs over into EasyBlog. To enable integrations with Google Docs, follow the steps below:
Login to your Joomla backend and navigate to
Components > EasyBlog > Settings > Editor > Integrations. Under the Google Docs section, enable the option Enable Google Document.
Head over to Google Console and login with your Google account. If you don't have a project, create a new project first. You can create a new project here.
If you already have a project, select your project and click on
APIs & Services > Dashboardand click on the+ ENABLE APIS AND SERVICES.
On the API library page, select and enable
Google Drive API.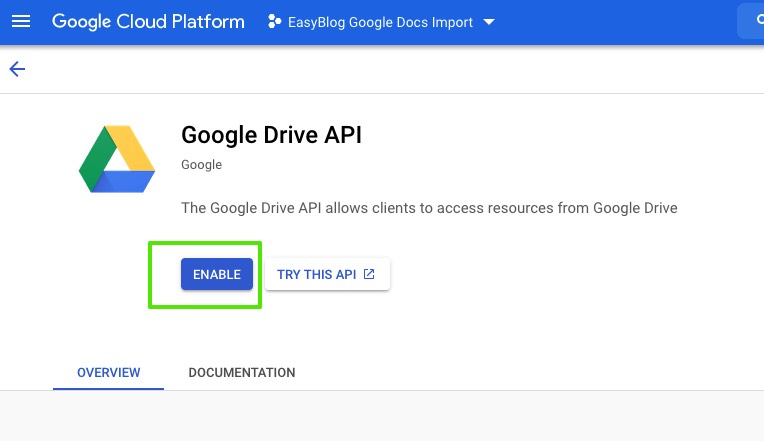
To ensure that you have successfully enabled Google Drive API, go back to
APIs & Services > Dashboardand check ifGoogle Drive APIis listed on the dashboard as you can see below:
On the Dashboard page, click
Credentialson the sidebar. Then, click on+ CREATE CREDENTIALSand chooseOAuth Client ID.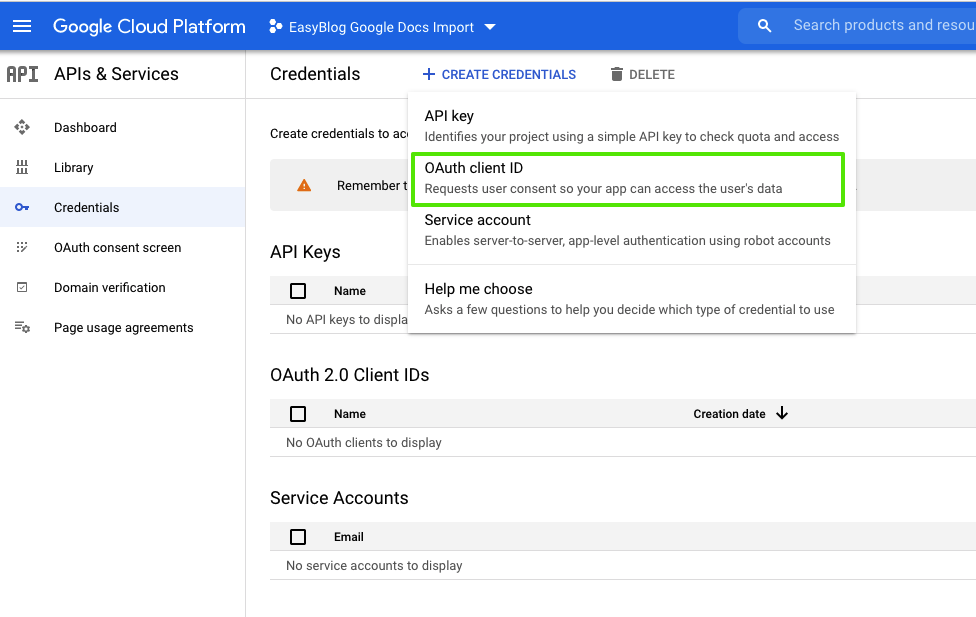
Google OAuth 2.0 requires you to go through the `configure consent screen` before you can create the OAuth client. Select 'external' User Type when you are settting up the OAuth consent screen.
Configure OAuth consent screen
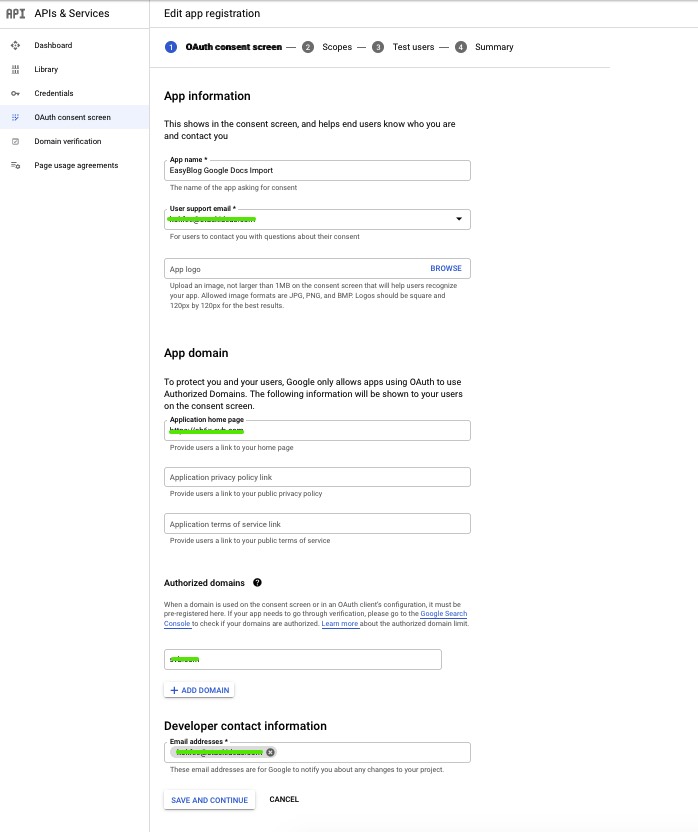
Enter the value on required input fields and click
SAVE AND CONTINUEApp name- Give a name to your OAuth client app.User support email- Enter your email address or the person who will be handling your Google projects.Application home page- Enter your website URL. E.g. https://www.yourdomain.comAuthorized domains- Add your website domain in this authorized domains section. E.g. yourdomin.comDeveloper contact information- Enter the email addresses who will be your supporting you on your website.
In the Scope page, you do not need to specify the scope here as the scope will be defined from EasyBlog. So just click on
SAVE AND CONTINUEto proceed to the next screen.In the Test Users page, you can add your tester users here. If you do not have any tester, you can skip this page by click on
SAVE AND CONTINUEand finally click onBACK TO DASHBOARDto complete your OAuth consent screen configuration.Creating the OAuth Client
Once you are done configuring the OAuth consent screen, you can now create your OAuth client. To do so, go back to
APIs & Servicedashboard and click onCredentialson the side bar.Then, click on
+ CREATE CREDENTIALSbutton and selectOAuth Client ID. SelectWeb Applicationwhen asked to choose the Application Type.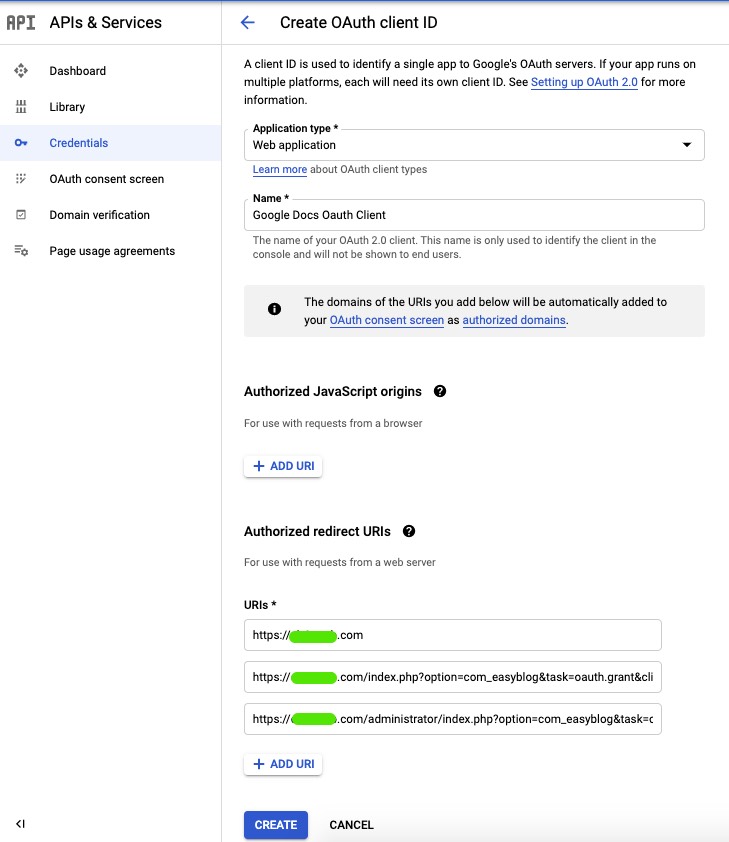
Name- Give a name to your OAuth client.Authorized redirect URIs- Enter the urls listed below and ensure that these urls begins with https://https://www.yourdomain.com
https://www.yourdomain.com/index.php?option=com_easyblog&task=oauth.grant&client=google
https://www.yourdomain.com/administrator/index.php?option=com_easyblog&task=oauth.grant&client=google
Remember to replace
www.yourdomain.comto your actual website url or else the OAuth authentication will fail when calling from EasyBlog.Once you completed the above, click the
CREATEbutton to complete the client creation and you will be provided with theClient IDandClient Secret.
Copy these keys into your text editor first as you will need to enter these keys into your EasyBlog settings.
If for whatever reason you missed the chance to copy the keys from the popup screen, don't worry you can always obtain these key by click on the download icon from your created client app listed in OAuth 2.0 Client IDs listing.
Head back to EasyBlog and insert these keys into Google Docs integration. Navigate to
Components > EasyBlog > Settings > Editor > Integrations. Enter both theClient IDandClient Secretkeys accordingly underGoogle Docssection.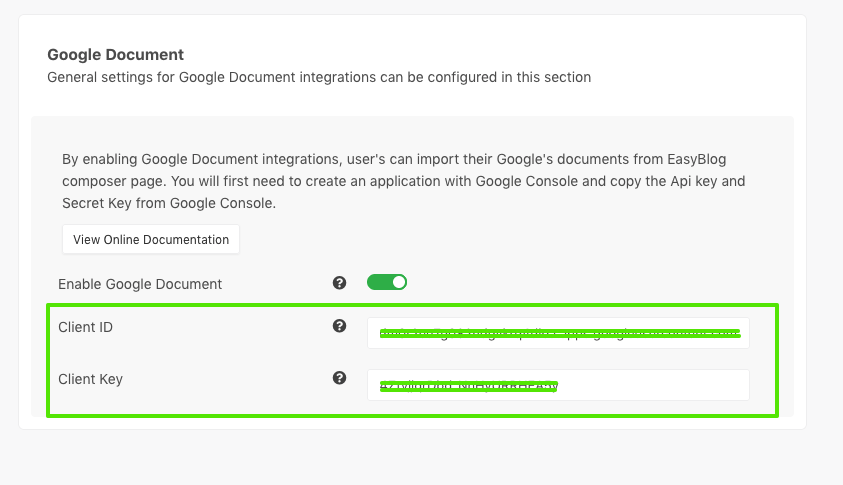


Authorization & Usage
Now, when you or your users attempt to create new blog post, you will be able to import the contents from your Google document as the blog post content. Click on
Import from Googlefrom EasyBlog's template selection screen to authenticate with Google and click 'Allow' to authorize your website to access to Google documents for import and follow the on-screen instructions to import your Google document into EasyBlog.
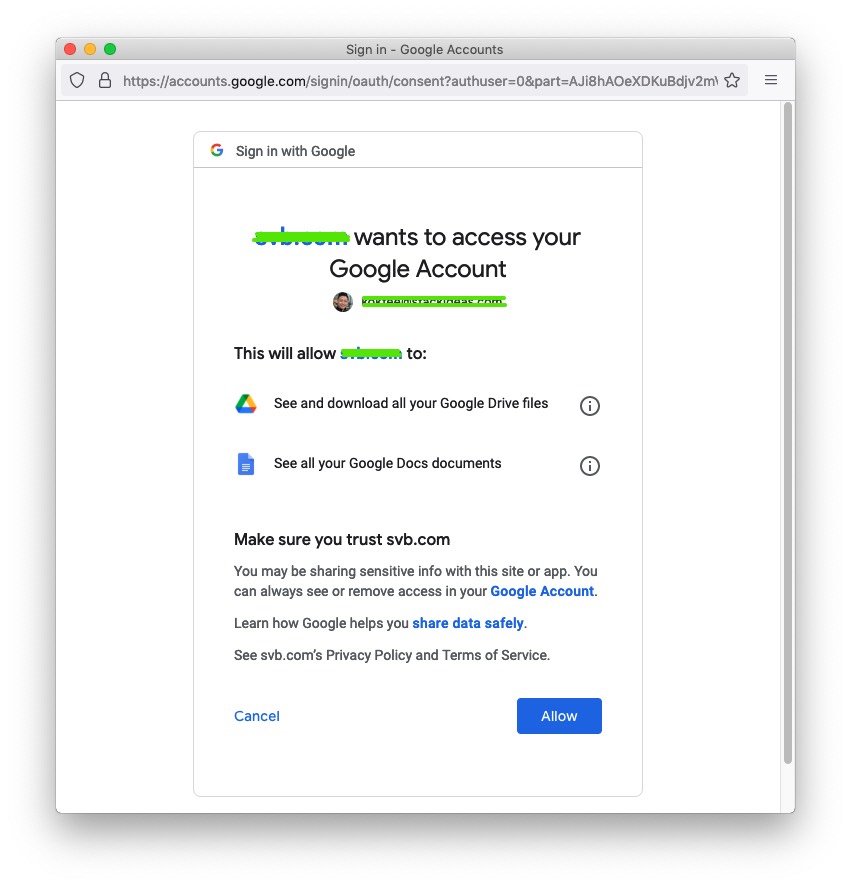
If you've configured EasyBlog to use Joomla editor such as TinMCE editor, to use this Google Docs import feature, make sure you've enabled the plugin
Button - EasyBlog Google Import. You can find this plugin fromJoomla backend > Extensions > Pluginspage. To ease your searching, you can filter the plugins witheditors-xtdplugin type.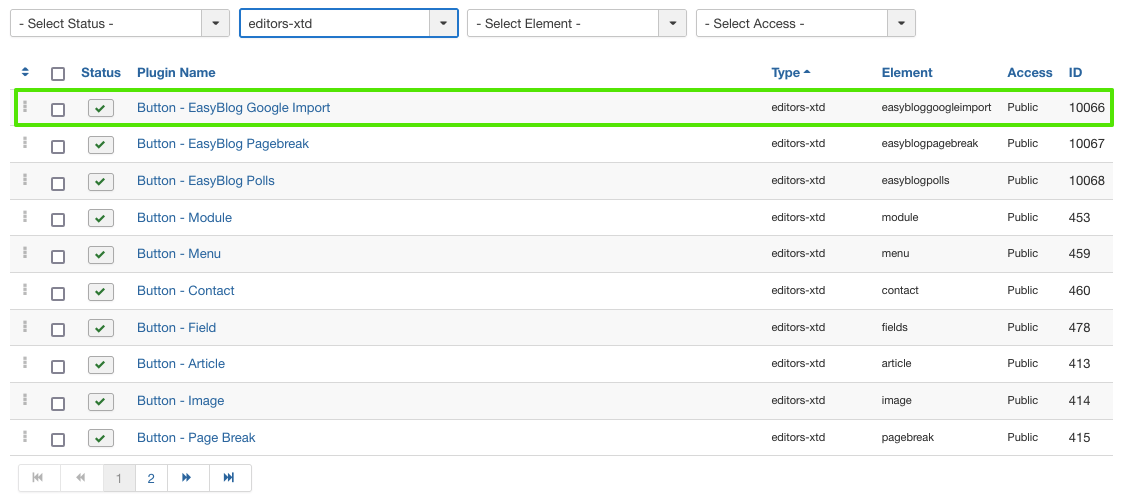

You should see the 'Google Import' button appeared in your TinyMCE editor. Click on this button will bring up the Google authentication popup screen and all you need to do is to follow the on-screen instructions to import your Google contents into EasyBlog.


De-Authorization
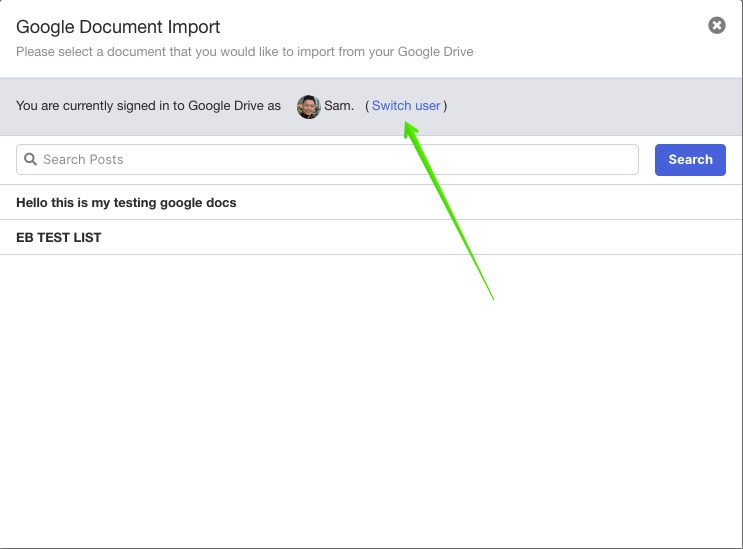
To de-authorize your current Google Drive access so that you can login with other Google account, just click on the 'Switch User' link in the popup screen shown as below: