Register for an account at Amazon S3. Once you have your account created, you may proceed to login.
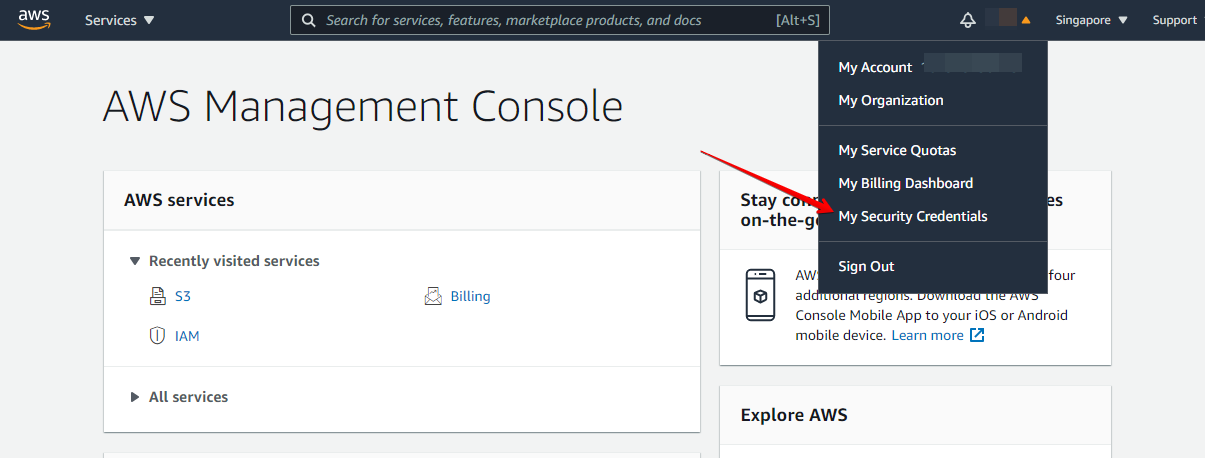
Once logged in, hover over your name on the top-right corner and click on Security Credentials.
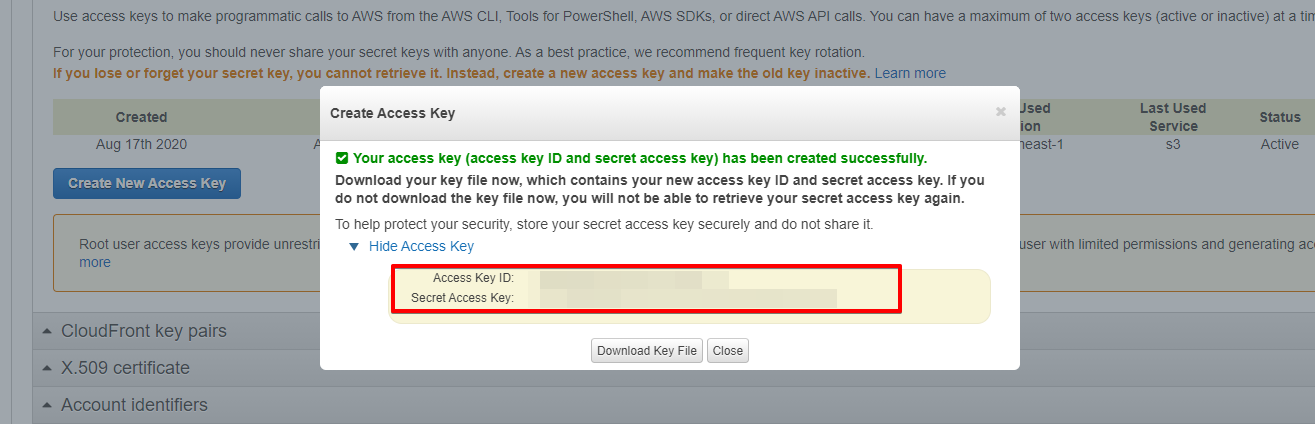
Under Access keys section, click on the Create New Access Key button as shown in the screenshot below.

Upon creating the keys, you'll need to click on Show Access Key button to copy both the Access Key ID and Secret Access Key to a safe location.
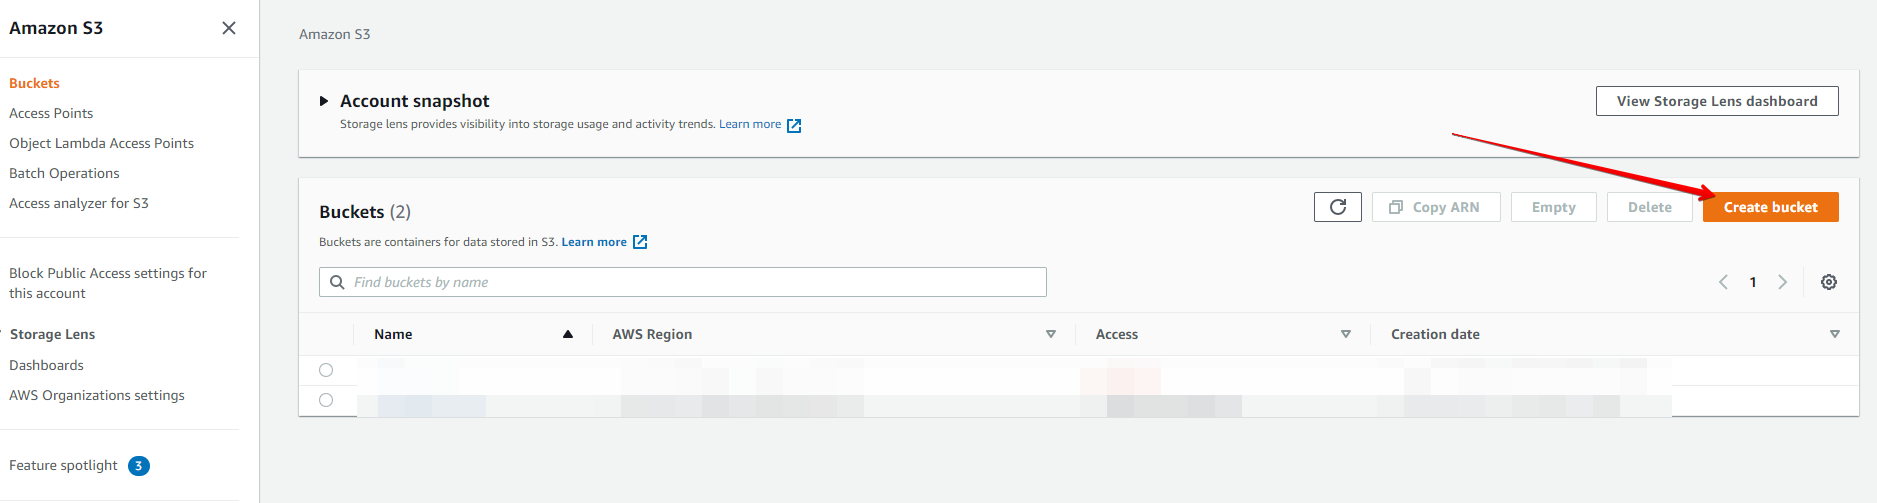
Head to Amazon S3 and start creating a bucket by clicking on the Create bucket button.
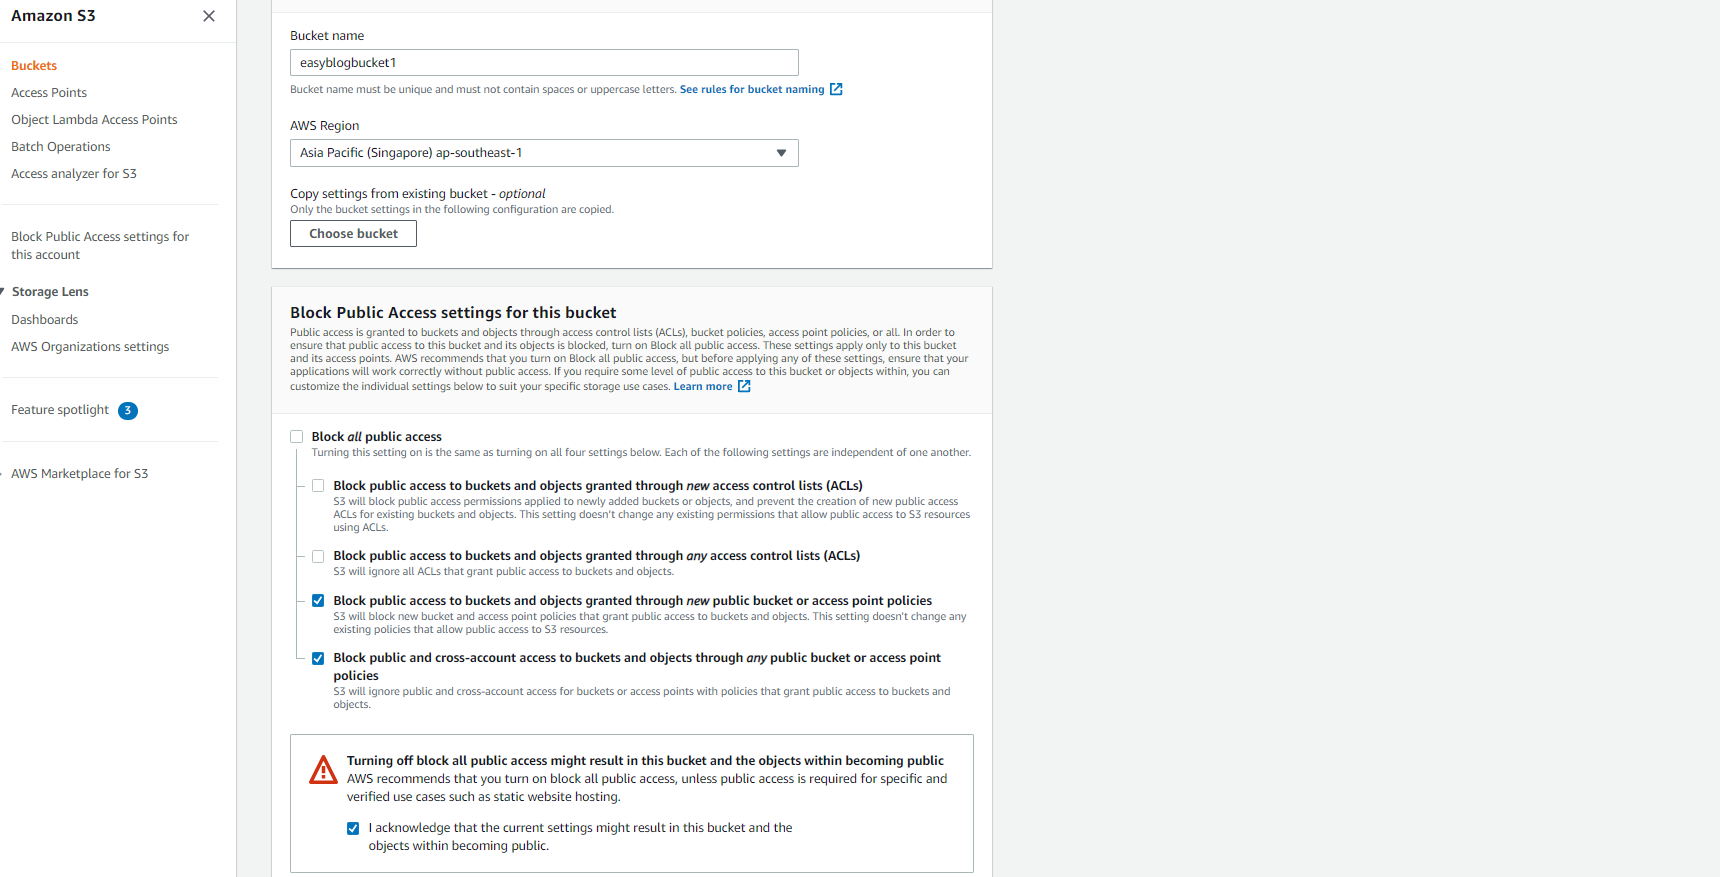
In the bucket creation form, under Block Public Access settings for this bucket section, you may start out by disabling the first 2 options. This allows you to start testing S3 later without hitting issues with S3 permissions. You may come back to re-configure them once you learn more about permissions on S3.
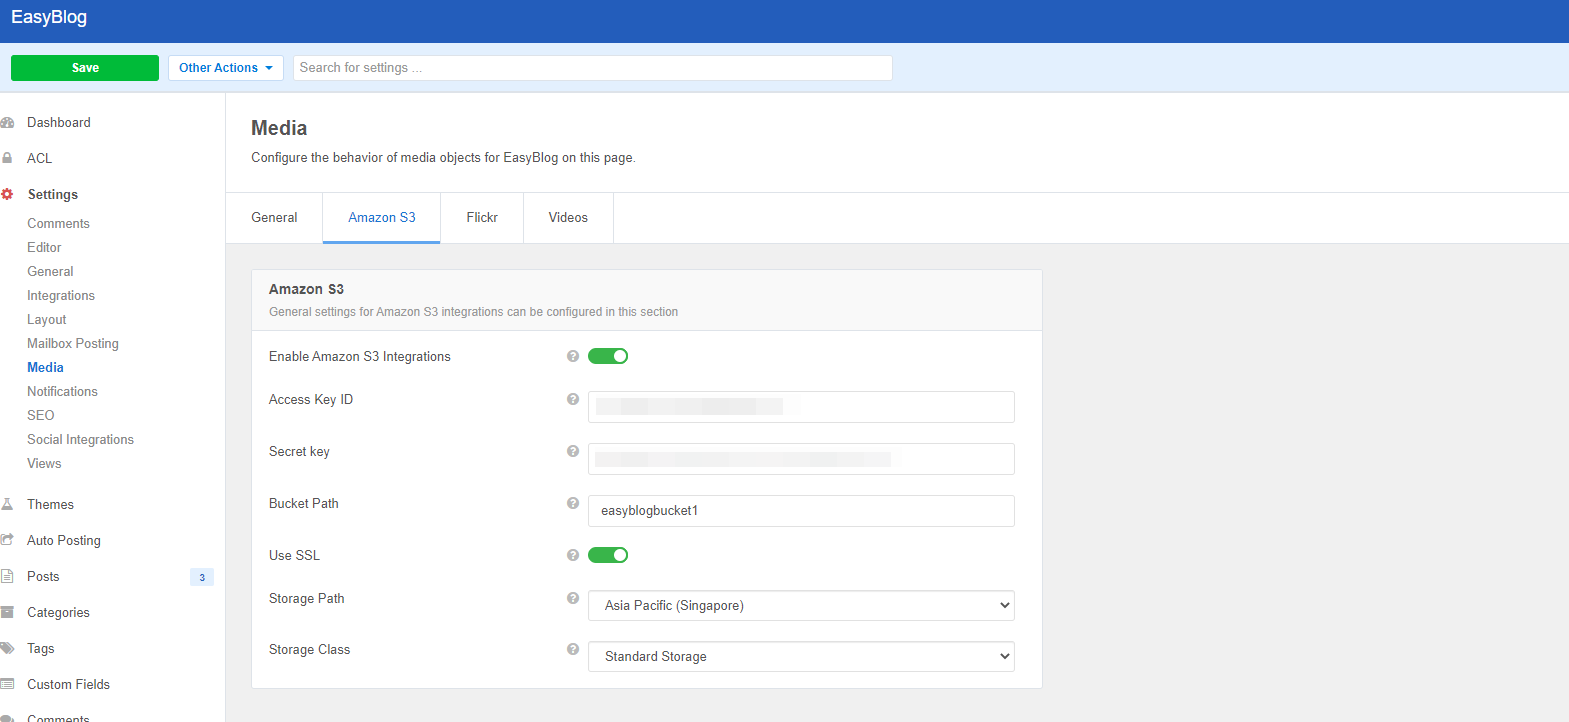
After completing the bucket creation, head to Components > EasyBlog > Settings > Media > Amazon S3 and fill in the information that you collected from the steps above(keys, bucket path, storage path).
To add new files in EasyBlog that will be stored on S3, you have to use the Amazon S3 tab inside the media manager on the composer page.


Setting up integration with Amazon S3 will not automatically migrate existing files and update existing posts. Likewise, this is also the case when disabling the feature.